
The Honeywell RTH6580WF1001 is a Wi-Fi-enabled‚ 7-day programmable thermostat designed for seamless residential HVAC control․ It offers remote access‚ customizable scheduling‚ and compatibility with various heating/cooling systems‚ ensuring efficient temperature management and energy savings․
1․1 Overview of Features and Benefits
The Honeywell RTH6580WF1001 offers advanced features like Wi-Fi connectivity and 7-day programmability․ It includes Smart Response Technology for optimal temperature control and customizable swing settings․ Compatible with various HVAC systems‚ it ensures energy efficiency and comfort․ Remote access via the Honeywell Home app allows users to manage settings from anywhere‚ promoting convenience and energy savings․
1․2 Importance of Proper Installation
Proper installation of the Honeywell RTH6580WF1001 is crucial for optimal performance and safety․ Incorrect wiring or setup can lead to system malfunctions or inefficiency․ Ensure compatibility with your HVAC system and verify wiring connections‚ especially the C-wire requirement․ Correct installation guarantees reliable operation‚ energy efficiency‚ and access to all smart features‚ avoiding potential issues like blank screens or power failures․

System Compatibility and Requirements
The Honeywell RTH6580WF1001 works with 24-volt HVAC systems‚ including heat pumps‚ gas‚ oil‚ and electric systems․ It requires a C-wire for power and is not compatible with millivolt systems․
2․1 HVAC System Compatibility
The Honeywell RTH6580WF1001 is compatible with most HVAC systems‚ including gas‚ oil‚ electric‚ and heat pumps․ It supports multi-stage systems‚ up to three heating stages and two cooling stages‚ ensuring versatile installation options across various home configurations․ Proper system compatibility ensures efficient performance and seamless integration with existing heating and cooling setups․
2․2 Electrical Requirements and Wiring Needs
The Honeywell RTH6580WF1001 requires a 24-volt HVAC system and a C-wire for consistent power supply․ Ensure your system is compatible with these requirements; If a C-wire is missing‚ some features like Wi-Fi may not function properly․ Verify wiring connections before installation to avoid malfunctions and ensure safe operation․ Proper wiring ensures reliable thermostat performance and functionality․
Tools and Materials Needed for Installation
For installation‚ you’ll need a screwdriver‚ Drill‚ wire strippers‚ and voltage tester․ Ensure a C-wire is present; if not‚ a C-wire adapter may be required․
3․1 Essential Tools
The essential tools needed for installation include a small screwdriver for removing the old thermostat and handling wires‚ a drill for creating wall anchors‚ wire strippers for preparing connections‚ and a voltage tester to ensure power is off․ These tools ensure a safe and efficient installation process for your Honeywell RTH6580WF1001 thermostat․
3․2 Required Materials
The materials needed include wall anchors and screws for secure mounting‚ wiring labels for organization‚ and a C-wire adapter if your system lacks a common wire․ Additionally‚ the quick reference card provided with the thermostat aids in installation․ These materials ensure a proper and efficient setup of your Honeywell RTH6580WF1001 thermostat․

Step-by-Step Installation Guide
Begin by turning off your HVAC system․ Follow the manual for detailed instructions‚ ensuring each step is completed systematically to guarantee a safe and correct installation process․
4․1 Mounting the Thermostat
Remove the old thermostat and ensure the wall is clean․ Align the wallplate with the mounting holes‚ secure it firmly‚ and snap the thermostat into place․ Ensure it is level for proper operation․ Insert the quick reference card into the slot on the back for future guidance․ This ensures a secure and accurate installation․
4․2 Wiring the Thermostat
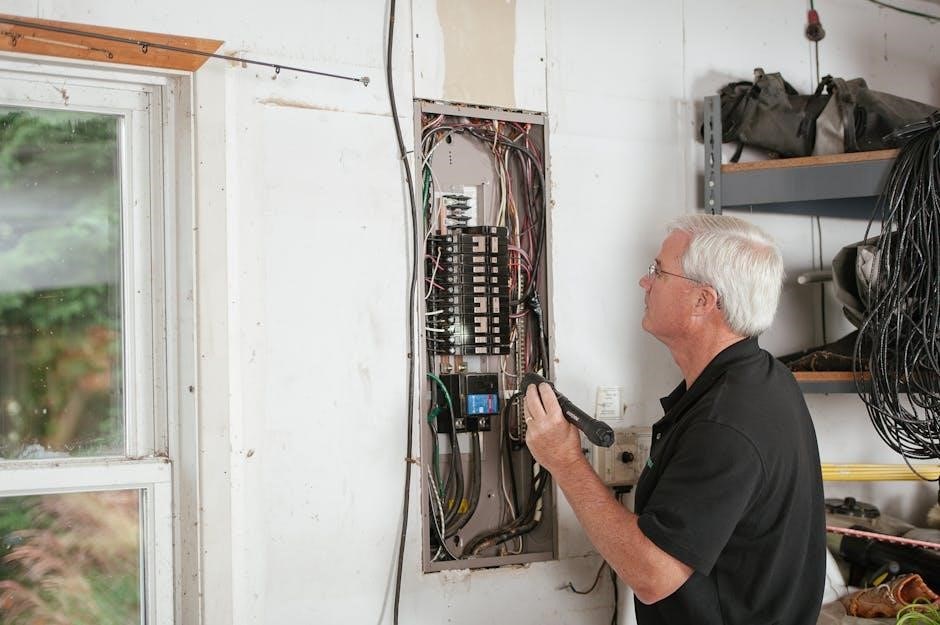
Turn off the HVAC system at the circuit breaker․ Match the wires from the old thermostat to the new one‚ ensuring correct terminal connections․ Use the C-wire for continuous power or an adapter if one isn’t present․ Secure all wires tightly and double-check connections for accuracy․ Refer to the manual for specific wiring diagrams and instructions to ensure proper installation and functionality․
4․3 Powering On the Thermostat
Restore power to the HVAC system at the circuit breaker․ The thermostat display should illuminate‚ indicating power․ Follow the on-screen instructions to complete the initial setup‚ such as setting the date‚ time‚ and system preferences․ Ensure all connections are secure and verify proper functionality․ Refer to the quick reference card or manual for guidance if issues arise during startup․

Connecting the Thermostat to Wi-Fi
Launch the Honeywell Home app‚ select your thermostat‚ and choose your home Wi-Fi network․ Enter your network password to establish a secure connection․
5․1 Setting Up the Wi-Fi Connection
To set up the Wi-Fi connection‚ download and install the Honeywell Home app․ Create an account‚ select your thermostat model‚ and choose your Wi-Fi network․ Enter your network password and follow in-app instructions to complete the connection․ Ensure your thermostat is powered on and within range of your router for a stable connection․
5․2 Troubleshooting Wi-Fi Issues
If the thermostat fails to connect to Wi-Fi‚ restart your router and thermostat․ Ensure your network password is entered correctly․ Move the thermostat closer to the router to improve signal strength․ If issues persist‚ reset the thermostat by removing it from the wallplate and reconnecting it after 30 seconds․ Check for firmware updates in the Honeywell Home app․
Setting Up the Honeywell Home App
Download and install the Honeywell Home app on your smartphone․ Create an account‚ register your thermostat‚ and connect it to your Wi-Fi network for remote control․
6․1 Downloading and Installing the App
Visit your device’s app store to download the Honeywell Home app․ Once installed‚ open the app and follow the prompts to create an account or log in if you already have one․ Ensure your smartphone is connected to your home Wi-Fi network for seamless thermostat integration and control․
6․2 Registering the Thermostat
Open the Honeywell Home app and select “Add Device” to begin registration․ Scan the QR code located on the thermostat or in the manual․ Follow the in-app instructions to link your thermostat to your account․ Ensure your thermostat is powered on and connected to Wi-Fi during this process for successful registration․
6․3 Configuring App Settings
After registration‚ access the app settings to customize preferences․ Adjust temperature ranges‚ set notifications‚ and enable features like geofencing․ Ensure your Wi-Fi network is selected and functioning properly․ Customize schedules‚ set energy-saving modes‚ and review usage reports․ These settings enhance comfort and efficiency‚ tailoring the thermostat’s performance to your lifestyle․

Programming the Thermostat
Programming the Honeywell RTH6580WF1001 is straightforward‚ allowing users to create custom temperature schedules and adjust settings for optimal comfort and energy efficiency․
7․1 Creating a Temperature Schedule
Creating a temperature schedule on the Honeywell RTH6580WF1001 is simple․ Press the Menu button‚ navigate to the Program option‚ and set your desired temperatures for different times of the day․ This feature allows you to optimize energy usage while maintaining comfort․ The thermostat also supports remote adjustments via the Honeywell Home app for added convenience․
7․2 Adjusting Temperature Settings
Adjusting temperature settings on the Honeywell RTH6580WF1001 is straightforward․ Use the up and down arrows to increase or decrease the set temperature․ The thermostat also allows for remote adjustments via the Honeywell Home app‚ ensuring you can fine-tune your comfort levels from anywhere․ This feature helps optimize energy usage while maintaining your preferred temperature settings throughout the day․

Advanced Features and Customization
The Honeywell RTH6580WF1001 offers advanced features like Smart Response Technology for adaptive heating/cooling and customizable swing control to minimize temperature fluctuations‚ enhancing comfort and efficiency․
8․1 Smart Response Technology
Smart Response Technology in the Honeywell RTH6580WF1001 learns your home’s temperature patterns and adjusts heating/cooling systems preemptively․ It ensures consistent comfort by adapting to your schedule and preferences‚ optimizing energy use while maintaining desired temperatures․ This feature helps reduce manual adjustments and enhances overall system efficiency․
8․2 Customizable Swing Control
Customizable Swing Control on the Honeywell RTH6580WF1001 allows users to adjust the temperature range for heating and cooling cycles․ This feature minimizes frequent system starts and stops‚ reducing wear and tear․ By tailoring the swing setting‚ users can balance comfort and energy efficiency‚ ensuring the system operates smoothly according to their preferences and specific HVAC requirements․
Troubleshooting Common Issues
Address common issues like blank screens‚ Wi-Fi disconnects‚ or system malfunctions by checking power sources‚ resetting circuits‚ and verifying network connections for optimal thermostat performance․
9․1 Blank Screen or No Power
A blank screen or no power on your Honeywell RTH6580WF1001 indicates potential issues with the power supply․ Check if the circuit breaker or fuse controlling the thermostat has tripped or blown․ Ensure the thermostat is properly wired and connected to a 24V power source․ If the issue persists‚ restart the system or consult the manual for further troubleshooting steps․
9․2 Wi-Fi Connectivity Problems
If your Honeywell RTH6580WF1001 thermostat fails to connect to Wi-Fi‚ ensure your network is functioning properly and the thermostat is within router range․ Verify Wi-Fi credentials during setup․ Restart your router and thermostat‚ then attempt reconnection․ If issues persist‚ check for firmware updates or consult the manual for advanced troubleshooting steps to resolve connectivity problems․
9․3 Heating/Cooling System Malfunction
If the heating or cooling system fails to respond‚ ensure the thermostat is properly wired and configured․ Check for loose connections‚ incorrect wiring‚ or compatibility issues with your HVAC system․ Verify that the thermostat settings match your system type (e․g․‚ heat pump‚ gas‚ or electric)․ Restart the system and thermostat‚ and consult the manual for troubleshooting steps to resolve operational issues․
The Honeywell RTH6580WF1001 thermostat offers advanced features for enhanced comfort and energy savings․ For further assistance‚ refer to the official manual or contact Honeywell customer support․
10․1 Final Check and Verification
After installation‚ ensure the thermostat is securely mounted and powered on․ Verify all wires are correctly connected and the Wi-Fi setup is complete․ Check the temperature schedule and settings to confirm they are programmed correctly․ Test the HVAC system to ensure it responds appropriately to temperature changes․ Finally‚ review the manual for any additional verification steps․
10․2 Where to Find Additional Support
For further assistance‚ visit Honeywell’s official website or refer to the user manual․ The Honeywell Home app also offers troubleshooting guides and FAQs․ Additionally‚ online forums and customer support services are available for resolving complex issues or addressing specific concerns related to the RTH6580WF1001 thermostat․